*This post may have affiliate links, which means I may receive commissions if you choose to purchase through links I provide (at no extra cost to you). As an Amazon Associate, I earn from qualifying purchases. Please read my disclaimer for additional details.
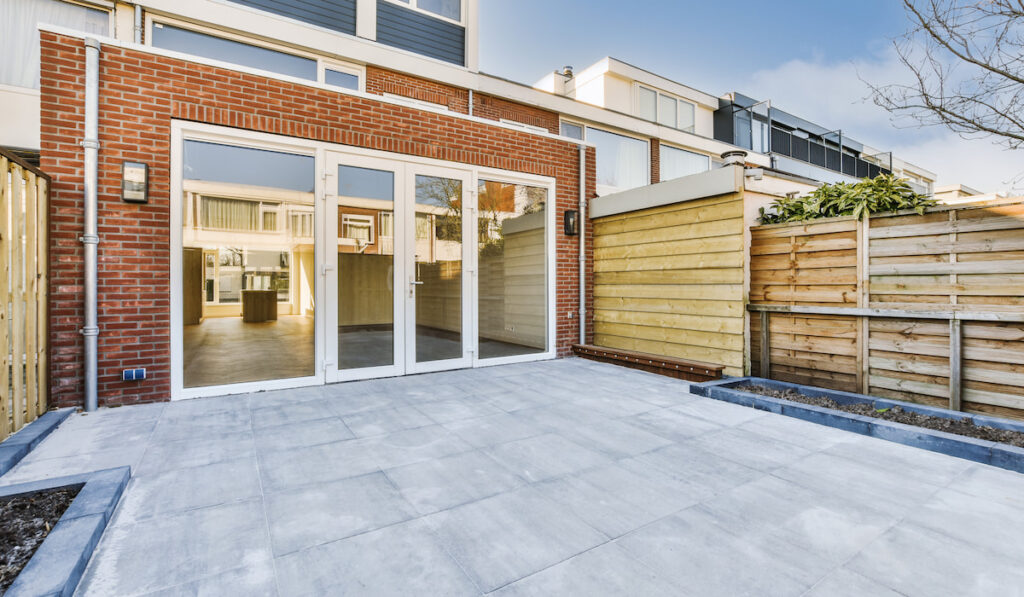
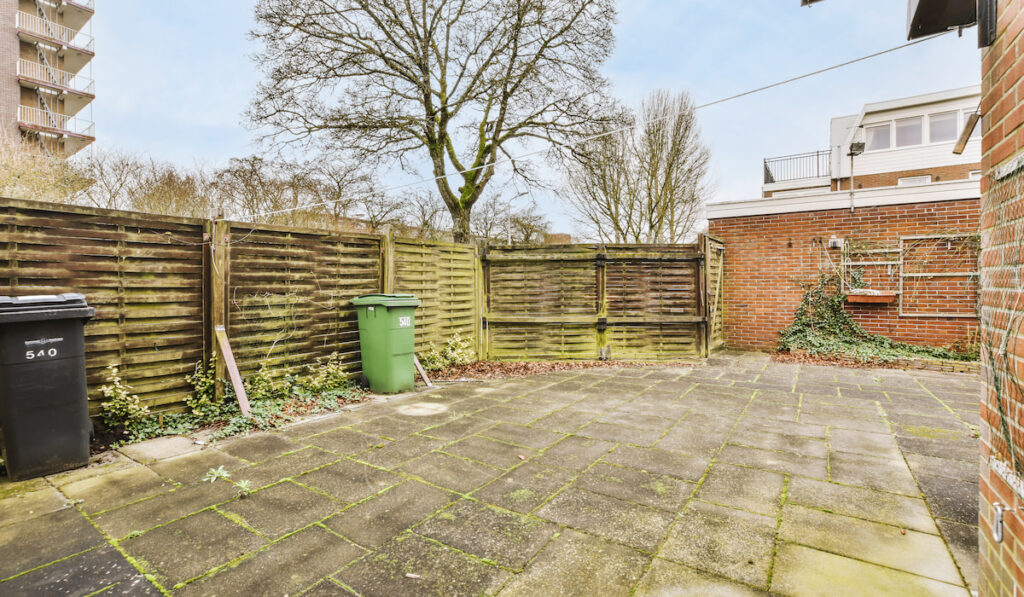
The uneven paving slab is the natural nemesis of unguarded toes. If you are barefoot, walking around on your patio, and one of the slabs is no longer sticking properly, it will find its way to your toe (or maybe your toe will find its way to it). Either way, patio stones that are sticking are a problem.
When your patio stones are refusing to stick or have come out of place over time, it’s likely due to the quality of the underlying bed. A quality bed beneath your patio stoned makes all the difference in the world.

Many so-called experts will point to the mortar, whether it is weakened between the joints or there is no mortar there at all. However, mortar rarely has anything to do with the unevenness of your patio stones, as the joint is always going to be too weak (mortar or not) to sustain in the long term.
Table of Contents
Mortar is Not the Problem
The reason we are even bringing this up is because of how frequently mortar is pegged as the culprit behind a loose patio stone. The fact is, if the bed beneath the patio stones is no good, then the joints are taking all of the pressure and stresses from everyday use.
That means that refilling the joints with mortar is not much more than a very temporary solution that happens to have a decent aesthetic effect.
Mortar also maintains a weak bond with patio stones and only remains in place so long as the underlying bed is in perfect condition.
A lot of people believe and will repeat on the internet that simply replacing old mortar that’s broken away, cracked, or flaking apart at the edges will fix the problem. Technically, it will, but only for a very short time.
The harsh reality is that if you have patio stones that aren’t sticking and staying in place, the mortar is not the problem.
How Does the Bed Affect Patio Stones?
The bed beneath the patio stone is supposed to carry the whole load-bearing necessary to keep patio stones in place. In fact, if you place the bed properly prior to laying the paving stones, you won’t even have to use mortar.
A well-put-together foundation should be a mix of stone and sand, compacting at each layer, and placed in order, only after the area has been properly prepared for patio stones. That includes sloping, which allows for a suitable level of drainage.
The last thing that you want is to have standing water underneath the patio stones, degrading the sand and larger aggregate layers beneath the patio stones, a problem that will take a toll on the stones above over time.


How Do You Know When it’s Time to Re-lay Your Patio Slabs?
If you only have one slab shifting around inside of the rest, it’s not a sign of a singular problem but rather of things to come.
While you can certainly remove a single patio slab and fix the immediate problem, the cause is likely to spread and you should probably consider re-doing a large portion, if not all, of the foundation underneath.
You want your patio slabs to resemble the tile work inside of your home (assuming you have tile work), because it is smooth, level, and even throughout.
Any time that you catch yourself tripping across your patio, you have yourself an uneven patio slab problem.
Oftentimes, it won’t even be a matter of one paving stone sticking out and tripping you, but instead, it will sink into the ground. Maybe it will only sink ever so slightly and maybe it will sink a lot.
The point is, it’s an issue that is probably going to spread. If nothing else, it means there is a degree of erosion going on underneath.
Erosion of the material beneath the patio slabs is generally the result of pooling water or water that is draining out very slowly. If you notice that it is very wet underneath, after you remove one of the patio slabs, it’s time to consider doing the whole foundation all over again.
However, on the next go-round, you’ll want to ensure that the entire foundation is designed so that water can freely drain out from it. Water is not only the natural enemy of stone, it also helps create that ugly mold and fungus that always seems to crop up between the stones.
How To Properly Lay the Bed for the Patio Stones?
Tips for laying your underlying foundation bed are the same whether you are doing it for the first time or you are removing loose patio stones so that you can redo the bed.
The same process applies either way you go. Since we are primarily dealing with the question of loose patio stones, we’ll start with getting the stones up.
- Chisel, spade or a wide scraper
- Rubber Mallet
- Mortar (optional)
- Trowel
- Joint Mix (optional)
The mortar and joint mix are only optional because it depends on how the bed was originally constructed. If you or the previous owner used mortar mix then that is what you will have to stick with to fix loose patio stones.
Don’t worry, we’ll also cover some other foundational aggregates as well.
Mortar Base and Joint Compounds
If the patio slab is loose, then the odds are, that the joint compound is a non-issue as far as removing the slab and having a look at the underlying material. However, you will need to remove excess mortar and joint compound from the patio slab once you get it up.
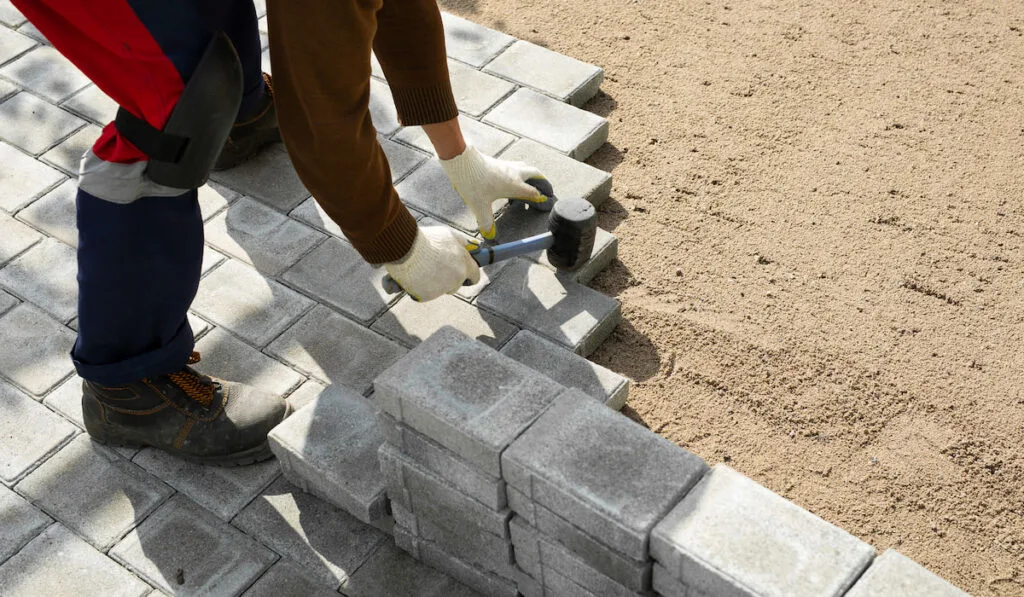
Use your chisel, spade, or a wide scraper to gently pull up the patio slab(s) that are problematic and it would be a good idea to also test the patio slabs around it as well. If they are stuck fast and not pulling up, then they are still good.
- Use your wide scraper to scrape off all of the excess mortar and joint compound from the patios slab(s)
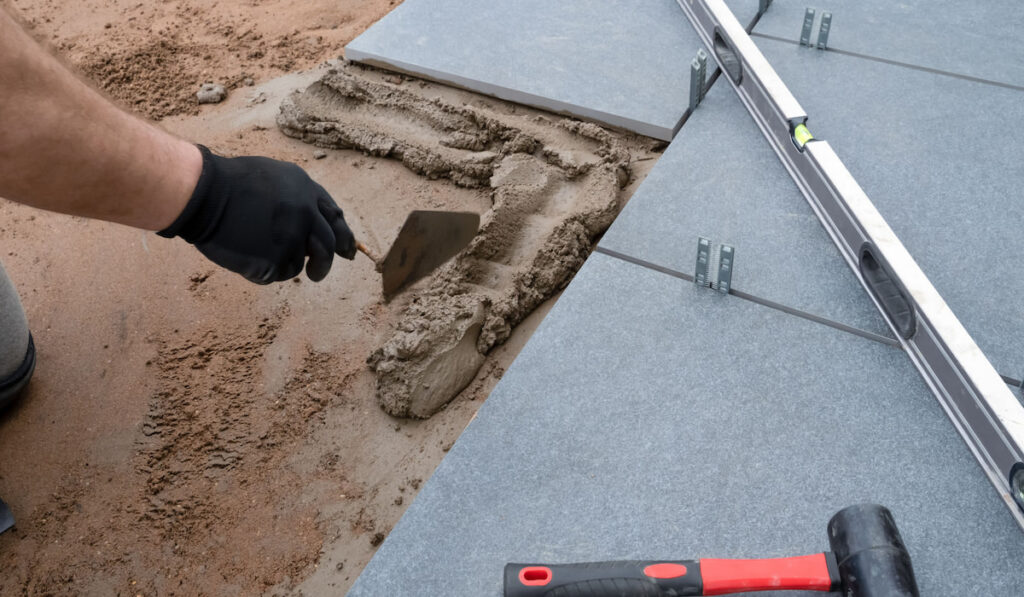
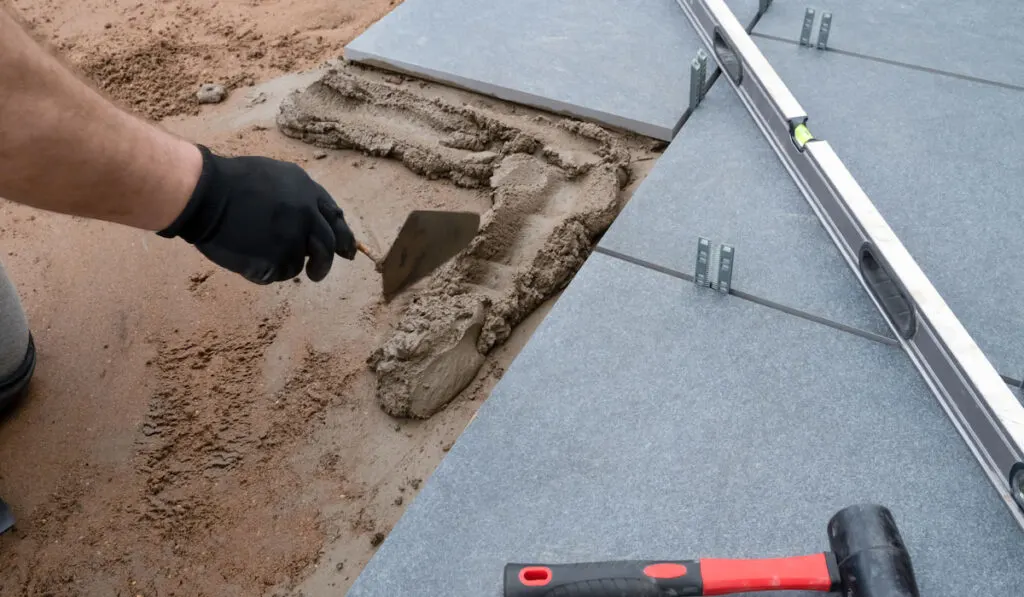
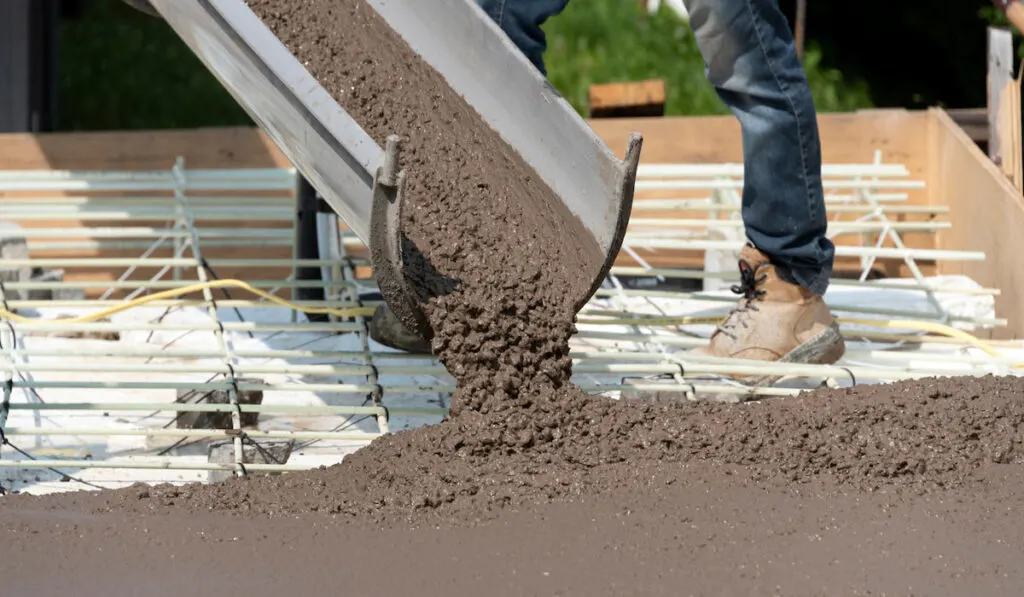
- Mix your mortar compound at a 1:4 ratio of cement to sand respectively
- When mixing the mortar, only add enough water to make it thick
- Ensure that 1 and ½” of the underlying material is removed
- Pour in mortar to the 1 and ½” mark
- Place your patio slab
- Re-joint your slab
When rejointing your slab, you will use the same mortar mix that you used for the foundation. All you need to do is set the material down and push it with a push broom over the cracks between the paving stones and gravity will handle the rest.
You can also use a No products found. or No products found. to accomplish the same goal or reapply the joints. All of them are good choices with the only major differences being in terms of cost.
Using Aggregates Only

While mortar at the bottom of a patio slab will do the trick, a properly installed foundation bed will do every bit as well and you won’t need to mix any mortar or use joint compounds unless you just want to. When it comes to using aggregates, you have plenty of options.
- Sand
- Crushed stones
- Recycled concrete
- Stone dust
- Recycled concrete
The best way to take advantage of using solely aggregates for your base layer is to use both stone and sand, preferably with the stone crushed.
You will need a compactor as well and you can usually rent a No products found. from Home Depot or Lowes
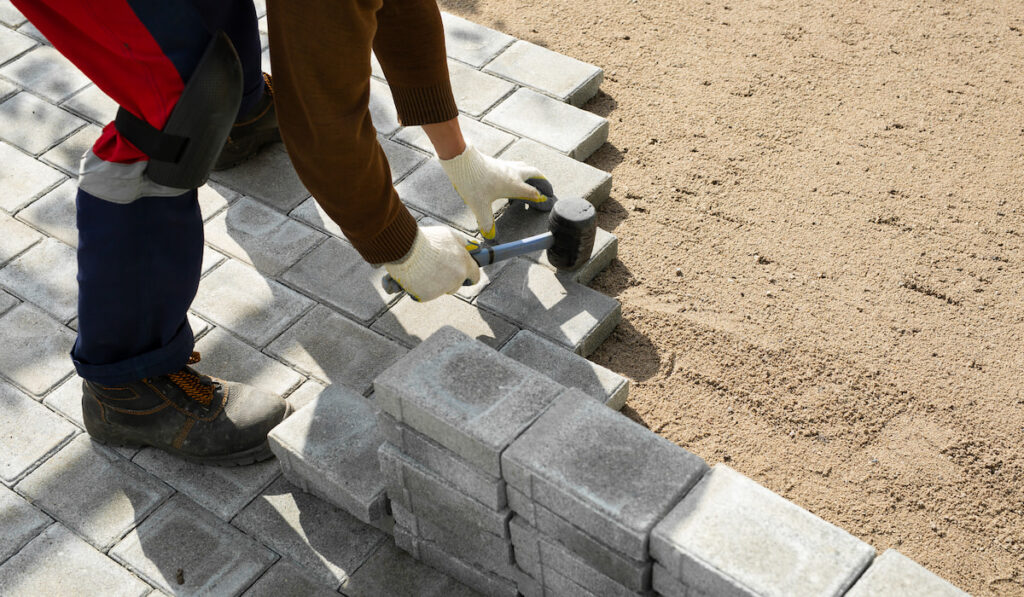
If you are rebuilding the base layers underneath your patio slabs, it’s just a matter of removing enough patio stones to reappropriate the two layers of stone and sand, compact them each, and replace the patio slabs.
If you are doing the entire thing, you can’t just start laying out rocks. The area needs to be properly dug out first, with the underlying, natural layer of soil compacted and leveled before you proceed.
- Start by spreading between 4” and 12” of crushed stone
- Go through and compact everything
- Apply your sand layer
- Compact it again
- Go through and install your patio slabs
- Joint your slabs using mortar (optional)
You want to do everything as quickly as possible so that the weather doesn’t have time to affect your base layers before you can get your patio slabs on top of it.
The mortar is optional, however, if you do everything right and the sub-base, along with the base are heavily compacted, the patio slabs will never move.

As mentioned above, when you are leveling everything out, prior to placing your aggregate, be sure to slope it ever so slightly, as this will keep rain water from pooling up and settling beneath your patio slabs.
All Things Considered
If your patio slabs are not sticking, it’s almost always something to do with the underlying base material. Usually, it has to do with the slow erosion caused by water.
Regardless of the cause, it is often necessary to redo the entire foundation, especially if you were not the person who originally installed it.
Resources
(November 3, 2021). How To Relay Loose Paving Slabs: [Sticking Down Rocking Pavers]
Retrieved from: https://www.northeastpavingandgardens.co.uk/how-to-relay-loose-patio-slabs/
Why Are My Patio Slabs Not Sticking? – Common Reasons
Retrieved from: https://gardenersyards.com/why-are-my-patio-slabs-not-sticking-common-reasons/