*This post may have affiliate links, which means I may receive commissions if you choose to purchase through links I provide (at no extra cost to you). As an Amazon Associate, I earn from qualifying purchases. Please read my disclaimer for additional details.
Storing lumber in your garage can be a great solution to a tricky storage situation. Storing lumber outside isn’t best, and who wants to be lugging heavy, awkward boards up and down steps and through doorways to get to the basement? Not us!
So, you’re wondering how to store lumber in your garage? The best way to store lumber in your garage is to sticker the lumber or use storage racks that allow the lumber to be laid horizontally. These racks can be purchased or DIYed.

Storing lumber can be pretty simple, but you will need to put some thought into it. If you just start throwing wood in a heap, you’re going to end up with more bonfire wood than you need. Continue reading to find out how to prevent warping, what your storage rack options are, and how to organize your scrap wood collection.
Table of Contents
Can You Store Lumber in Your Garage?
Yes, you can absolutely store lumber in your garage as long as it isn’t green lumber. Any lumber you buy at the lumber yard is going to br kiln-dried and ready for storage in an enclosed space.
The only issue with storing your lumber in your garage is that many garages are not climate controlled. This can lead to warping and issues when projects are moved into a climate-controlled situation.
Many of the issues can be avoided by following proper storage guidelines for your lumber.
How to Store Lumber to Prevent Warping
Your lumber might look perfectly dry, but even the best kiln-dried lumber will still retain some moisture and will take on moisture easily in humid or damp conditions. This moisture is the leading cause of lumber becoming warped.
If you’re lucky enough to have a climate-controlled garage, then warping caused by humidity won’t be a problem for you, but most people don’t have this luxury.
Step One: Select the Best Lumber
If you are selecting each piece of lumber for your project individually, you should choose pieces that have the most riftsawn and quartersawn grain because these are more resistant to warping than a board with more flatsawn grain.
- Quarter Sawn Lumber: The end grain will be nearly vertical and tight. This option is usually cheap, but not suitable for woodworking due to its being prone to warping.
- Rift Sawn Lumber: The end grain will be less vertical, closer to a 45 degree angle, and the grain will be further apart. Rift sawn lumber is less likely to warp than quarter sawn.
- Flat Sawn Lumber: The end grain will be a curve. The milling process for flat sawn lumber creates more waste, and so you can usually tell it is flat sawn by its price tag.
For a visual explanation, check out Wood Magazine’s article on the subject.
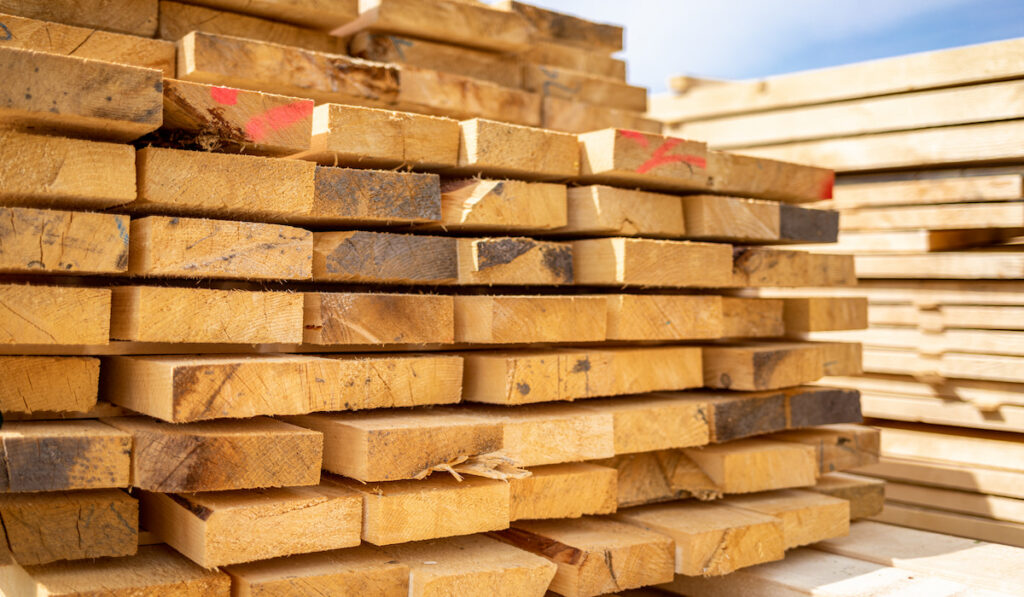
Step Two: Sticker Your Lumber


Stickering lumber is the process of stacking lumber horizontally with strips of wood in between each layer. This will help keep the boards flat, but the real purpose of the strips is to increase air circulation around each board to prevent moisture from accumulating.
Here is how to sticker your lumber:
- Gather plenty of wood used as stickers. They should all be the same size and somewhere near 1 x 1 inches and made from dry, unstained wood.
- Lay stickers 12 inches apart on the floor of your garage.
- Place a layer of boards on the stickers. They should not be touching each other.
- Place stickers on top of the layer of boards 12 to 18 inches apart. Repeat these steps until you have a lumber pile that is no more than four feet high.
- You want your woodpile to be neat and tidy. Line up your wood as much as possible as you make your stack so that it doesn’t lean or have awkward board sticking out that you’ll bump into.
You can increase the air circulation under your lumber pile by raising it further, using 2x4s supported on cement blocks under the pile.
Step Three: Use a Fan
If your garage tends to be humid, increase the air circulation around your stickered wood by placing a fan or two near it and allowing it to run once or twice a day. You could also open your garage on a breezy day to allow more air in.


Step Four: Monitor Your Relative Humidity
This step is completely optional, but if you’re wondering if you should be worried about your wood or you keep running into issues with warping. Check your relative humidity.
Generally speaking, high humidity isn’t the culprit when it comes to warping. It is the change in humidity, and therefore moisture content of the wood that is the problem.
If you live in an area where the humidity levels fluctuate drastically, then you might need to keep a closer eye on your lumber. A good rule of thumb, especially when doing fine woodworking, is that the lumber should be stored in conditions that the final product would be placed in.
For example, if you’re making an end table, the wood should be stored in temperatures and humidity levels similar to the inside of your home.
What if Humidity is Still a Problem?
If your boards are still warping because of issues with humidity in your area, then consider installing a dehumidifier in your garage.
This will not only help keep your wood in good shape, but it will also make your garage more comfortable for you and help out other items you have stored in there.
Depending on the size of your garage, you would likely only need a 30 to 50 pint dehumidifier. Look for something on wheels so that you can relocate it easily as needed.
There are some other great options for reducing humidity in a garage. Check out our article on the subject: How to Control Humidity in a Damp Garage.
What if Your Garage is Leaky?
If your garage is leaky, you should definitely have that fixed as soon as possible, as it can cause more serious issues than warped wood.
In the meantime, store your wood well off the floor on cement blocks, palates, or suspended from the wall or ceiling to prevent it from getting wet.
Don’t Store Wood on Concrete


Whatever you do, don’t just plop your wood down on the concrete floor of your garage. Concrete is wet, believe it or not, and when wood comes in contact with concrete, it soaks in the moisture from the concrete, which will cause warping and issues with rot.
This will be less of a problem with pressure-treated wood, but why get into a bad habit and risk moistures issues?
Should You Store Lumber Vertically or Horizontally?
The safest and best way to store lumber is horizontal. There are very few out there that would contest this. It keeps the boards flat, prevents bowing and warping, and allows you to create an efficient woodpile.
But you can store wood that is kiln-dried and not exposed to excessive moisture or humidity vertically.
However, since you’re storing your wood in your garage, the chances of it being the proper humidity are pretty slim, depending on where you live.
If you are storing wood vertically, try to store it as upright as possible, supporting it with braces or plywood.
Thankfully there is still a way you can make use of all that vertical space without storing your lumber vertically, and that is where lumber storage racks come in.
Lumber Storage Racks and Carts
Lumber storage racks are a great way to use all of that vertical space in your garage and even potentially overhead space depending on the set up in your garage and your storage needs. Let’s go over some of your options.
Wall Mounted Lumber Storage Racks
No products found.
Wall-mounted lumber storage racks can be purchased or DIYed, and the design is simple enough that anyone could do it. They are essentially heavy-duty brackets that you would securely mount to the wall of your garage. The boards lay across the brackets.
- Store-Bought Wall Mounted Lumber Storage Rack: Commercially available racks are a sleek addition to any garage. It has 4 shelves and can hold up to 440 pounds in total. Because the price point is very economical, we recommend going with a store-bought method. DIYing it might be more fun, though, so it is up to you.
- DIY Wall Mounted Lumber Storage Rack: What most storage racks on the market can give you is a place to store your sheet goods and small shelves for small scraps. This DIY method from Gadgets and Grain takes that into account! Most people familiar with woodworking would find this project a breeze, and it is highly efficient.
We’ve seen some people using some pretty flimsy-looking shelving brackets to store their lumber across, and we would recommend steering clear of this option. Go for something rugged and durable to avoid a disaster in your workshop.
Vertical Lumber Storage Rack
While storing lumber vertically isn’t the best option, many people do it with success, and it is better than having your lumber in a disorganized mess.
- DIY Vertical Lumber Storage Rack: This video by KC Woodworks shows how to make a vertical rack. It is similar to the wall-mounted horizontal rack, but can admittedly hold more wood.
- Store-Bought Vertical Storage Rack: Honestly, the DIY storage racks are much more appealing, but if you don’t have time or aren’t interested in another project on your to-do list, No products found. would work.
Ceiling Storage Rack Options
Depending on the type of garage you have, you may be able to make use of ceiling space for your lumber storage.
Here are some ideas for your garage ceiling:
- Use the beams: If your garage already has beams, you can lay long boards across them. Consider adding a few beams if they are very far apart to prevent bowing in your lumber.
- DIY Ceiling Mounted Lumber Storage Rack: You could hang a rack from the ceiling that would hold long boards. These free plans from Fine Woodworking are nice looking and sturdy, and they could easily be modified to suit your needs and the type of lumber you’re storing.
- Store-Bought Overhead Storage Rack: There are many overhead storage options available for garages, but many will not meet the specific needs of lumber storage. This No products found., for example, is meant for general storage, but with a weight limit of 600 pounds, it could be readily adapted to lumber.
Lumber Storage Carts
If you don’t have a massive quantity of wood to store, then a storage cart might be able to handle all of your lumber storage needs. Of course, we can attest to the fact that the lumber collection seems to grow exponentially with each project. You may soon find yourself with quite the stock!
Unfortunately, there are no good lumber storage carts you can just pick up at your home improvement store, but the DIY options are fantastic.
- DIY Lumber Storage Cart: The benefit of building your own storage cart is that you can make it, and the compartment the sizes that fit your needs. This video by Steve Ramsey shows how to build your own from scratch. The nice thing about this cart is that there is room for some boards to be stored horizontally.
- DIY Scrap Storage Cart: This storage cart from Fine WoodWorking features nine cubbies that are great for storing scrap vertically.
- DIY A-Frame Storage Cart: This storage cart from Lumber Jocks has space for everything, including sheet goods, small scraps, and long boards. Be sure to check out the suggestions in the comments because they will help you fine-tune the design.
Some Get-The-Job Done Ideas
Sometimes we just need to get the job done. Here are some lumber storage solutions that might not be ideal, but they’ll get you through in a pinch.
- Garbage can: Use a heavy-duty garbage can to corral long pieces of lumber. Just be sure that it won’t tip over.
- An old ladder: If you have a ladder handy, you can place boards across the steps. Check the weight limit on your ladder to make sure you don’t overload it and set it up someplace that it won’t get knocked over.
- Cardboard tubes: Place several cardboard tubes vertically in a bucket, and organize small pieces of trim, dowels, or narrow pieces of lumber inside the tubes.
- Pipes: These would work just like the cardboard tubes, but could be a more durable solution.
- Under workbench: If you don’t already have things under your workbench, you could create shelves under there to lay lumber horizontally.
- Ropes and bungees: You can use ropes or bungee cords to hold light pieces of lumber in place and upright.
Lumber is Heavy
A word of caution. Remember that lumber is heavy. A single 2x4x8 weighs between 13 and 17 pounds (source). Make sure you’re storage rack, or cart is built and mounted in such a way that it can withstand the weight that you want to put on it.
How to Organize Scrap Wood
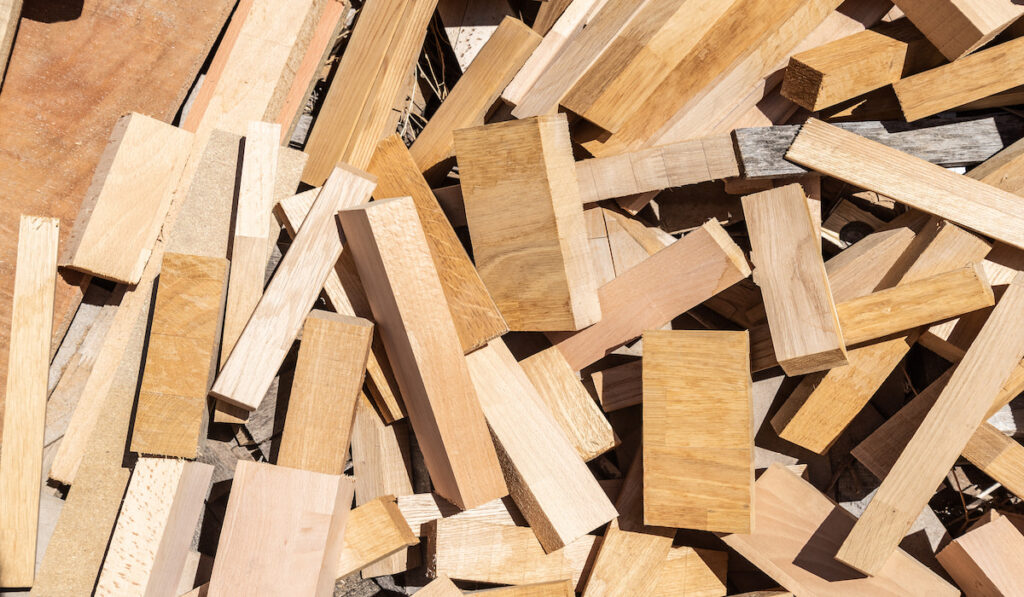

The hard part about storing scrap wood (besides the look your spouse gives you when they see your horde) is that the pieces are all odd sizes and awkward. Many of the above lumber storage solutions will work well with scrap wood, but the carts with cubbies are especially helpful.
Here is one process you can follow when organizing your scrap wood.
- Should you keep it? Before anything else, make sure the piece of scrap is worth saving. Is it warped or damaged? Will you use it in the near future or will be sitting on your shelf for decades? Is it large enough for the kind of project you would use? Is the wood high quality?
- Put like with like. Put small pieces you would use shims together in a bin. Put pieces that are similarly sized together in garbage cans or on your storage rack. Put trim pieces together.
- Don’t put shorts with longs. If you set short boards with long boards, you’re going to lose track of those short pieces, and you might as well just throw them away. Keep the shorts separate and in a container or cubby where they are visible.
- Organize for your next project. If you’re about to embark on a new project (we mean within the next week!), and you know you can use some of the scrap in it, set it aside.
- Shop your scrap. Before hitting the lumber yard, look through your scrap wood to see if any of it can be used. The trick to keeping your scrap organized in your garage is simply not having so much that it is unmanageable!
- Make sure reclaimed wood is in good shape. If your scrap includes reclaimed wood, make sure that it doesn’t have mildew or mold, or you could end up infecting your scrap collection.
- Find a project. Think up some useful scrap wood projects you can do to make use of some of that wood. Cutting board? Coasters? Blocks for kids? Floating shelf? Key hooks?
Now all you need to do is select one of the storage solutions above and get started sorting through that scrap pile, and your garage will be cleared up in no time!