*This post may have affiliate links, which means I may receive commissions if you choose to purchase through links I provide (at no extra cost to you). As an Amazon Associate, I earn from qualifying purchases. Please read my disclaimer for additional details.
“Nail pops,” the amusing term for nails popping out of your ceiling, is typically something that happens in older homes. More specifically, it happens in older homes that are framed with trusses rather than the rafters that most people are familiar with today. They can be highly annoying, especially as they seem to drop in out of nowhere.


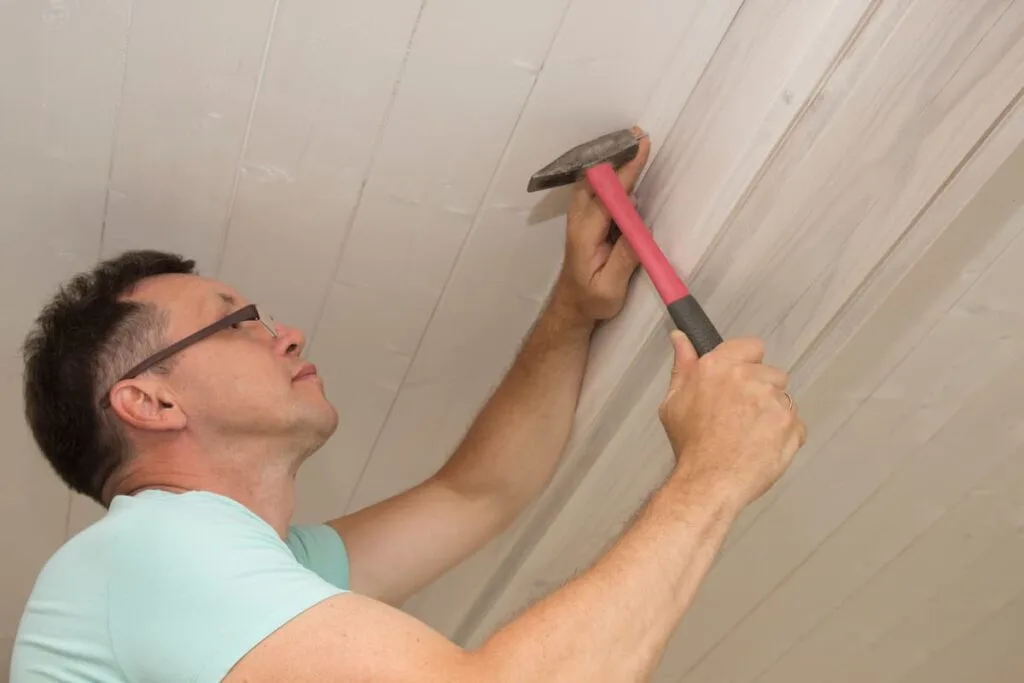
Fixing them means one of two options. You either push the nail back up into the ceiling, carefully and with a flat head hammer, or remove it after you have replaced it with drywall screws. In either case, you will also need some plaster, along with some other tools to properly fill and repair the hole.
Nail pops aren’t a common occurrence and they happen more frequently in proximity to the walls, around where a bit of crown molding would go a long way towards solving or, at the very least, hiding the problem.
For those that pop out in the middle of the ceiling, don’t worry, your roof isn’t in danger of collapsing.
Table of Contents
What Causes Nail Pops?
Nail pops are caused by the natural expansion or contraction of the underlying support structure, which is the wood frame. As the weather heats up, wood tends to expand, rising up as it does so. When winter arrives, or even just cooler temperatures, the wood contracts.
If during the expansion, one of the screws is repulsed from the wood to a small degree, it may push through the sheetrock when the wood contracts back into place.

Since the screw is no longer what you would consider a stable, holding screw, it’s best not to just push it back up so you can forget about it for a while.
The fact is, it will just pop back out later and all of the hard work that you went through sealing the hole with plaster will be undone.
When it comes to popcorn ceilings, nail pops may be a little bit harder to see, which makes pushing the screw back in even less palatable, because you will also crush the popcorn appearance.
The expanding and contracting of the wooden framework behind your walls is a completely natural event. So there is nothing wrong with your home if you start seeing the occasional nail pop throughout your home. It doesn’t mean that your home’s framework was ill-designed.
It also doesn’t mean that anything is getting ready to collapse.
If you see a nail pop or two in your ceiling, you are simply dealing with one of what probably amounts to hundreds of screws that hold your ceiling onto the above framework.
If you see nail pops in the walls, even if these walls are load bearing, it has nothing to do with the framework and everything to do with the sheetrock that is installed on the underlying framework. So there is no need to be overly concerned, however, it does need to be fixed, unless you just enjoy the look of it.
Repairing Nail Pops in the Ceiling
Repairing a nail pop in your ceiling isn’t too difficult a prospect, but you will need a few things before you get started.
- Drywall Screws
- Sandpaper
- Putty knife with a nail puller
- Drywall Joint Compound
- Damp Sponge
- Primer Paint
- Paint
- Stud finder
Just because the nail is trying to poke its way through your ceiling, doesn’t mean that’s exactly where the stud is located. It may be that the nail is coming out at an angle or that the places where you need to set your new screws aren’t gaps between intersecting beams.
It’s best to have a stud finder with you, so you know that when you screw in your drywall screw, you’re getting the wood on the other side of the drywall.
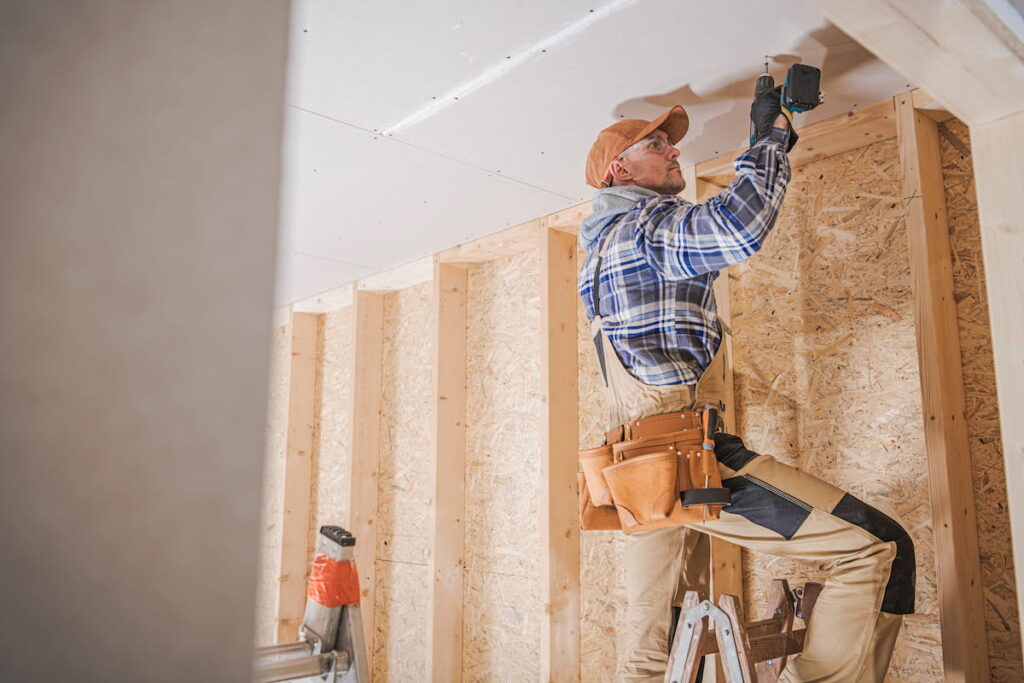
Locate the Studs and Screw the Sheetrock In
Choose a location that is 6” away from the nail pop and use a cordless or standard drill to screw in your first, 1 and ¼” screw.
Then choose another section, 6” away from the nail pop and on the opposite side of the first drywall screw.
Screw in a second 1 and ¼” drywall screw.
Remove the Nail
With two screws set in place, you can go ahead and begin removing the nail pop. Use your scraper to expose the nail head by scraping away the bulging sheetrock.
The idea is to get the nail out without crushing or otherwise damaging the sheetrock while you’re at it.
It’s easier said than done but one of the best ways to go about it is to use a very wide scraper that has an indention designed to grab and pull nails. The wider the surface area that the scraper has to lean on, the less damage it is likely to do.
As gently as you can, work the nail out of the stud and the sheetrock. The sheetrock screws that you put in place earlier will do their job and hold the sheetrock in place while you work.
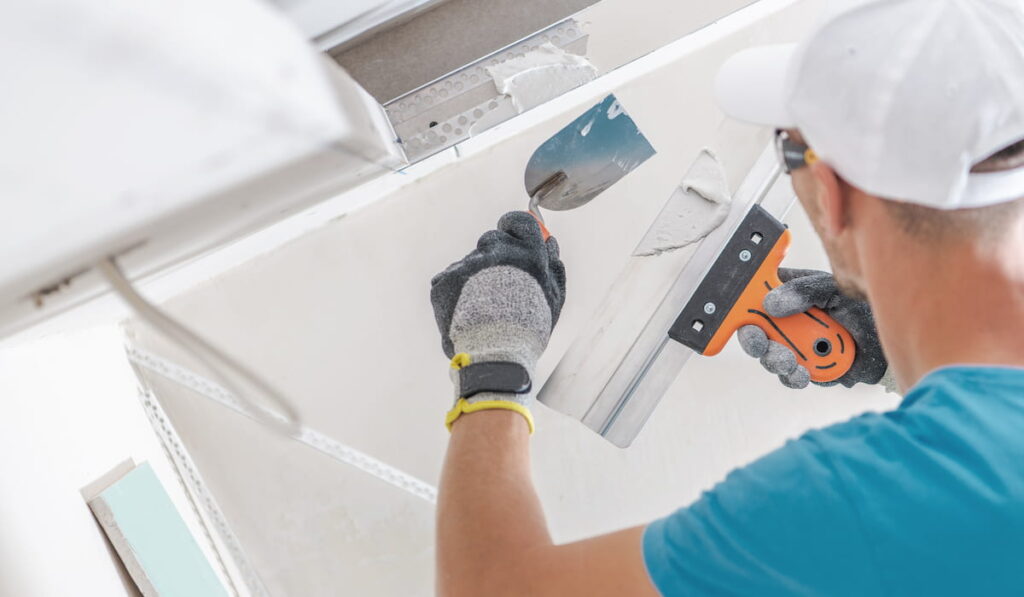
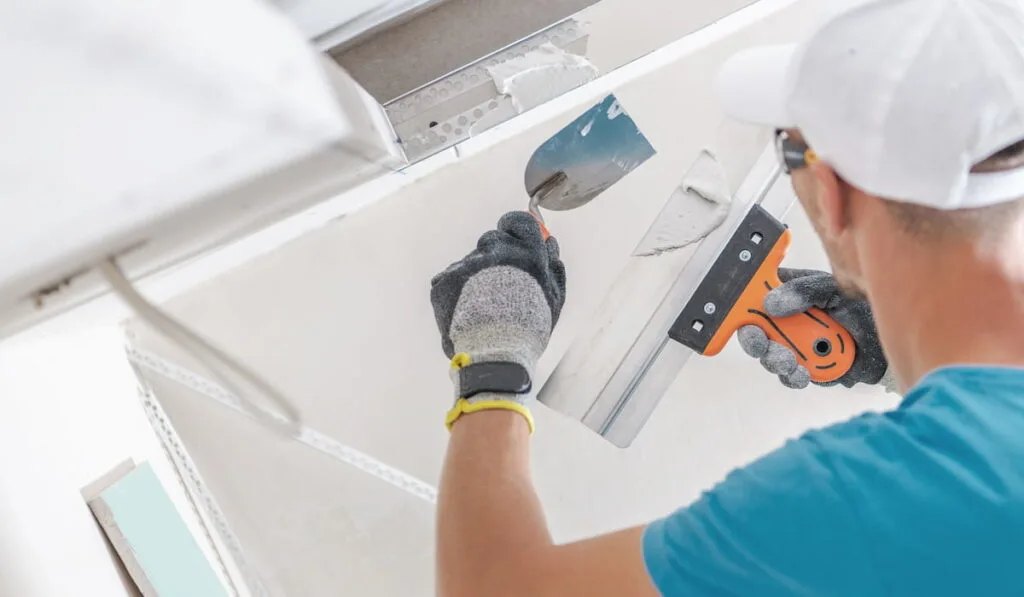
Clean and Sand the Area
Before you go slapping putty in the hole, you need to clean the area around the removed nail, especially if you did any damage while you are pulling out the nail.
So long as you were patient with it (it’s not always that easy), the damage from removing the nail should be minimal.
Use your scraper to remove any large particles of sheet rock, then go behind the scraper with some fine grit sandpaper, smoothing the area out as best you can.
You don’t have to go crazy with it, however, you will be throwing down some primer and finish paint later, and primer loves an abrasive surface to bond to.
Time to Fill the Hole
All you need for this is some simple, No products found.that you can find at your local hardware store or major hardware stores. Cover up your hole and don’t be afraid to be a little liberal with your joint compound application.
Smooth everything out by dragging the flat edge of your scraper over the section. Press additional joint compound into the hole if you didn’t get enough the first time.
Once you have scraped it clean, take a break and let it dry for a little while.
Sure, it will look ugly, but it’s not going to stay that way.
Paint and Primer
Most people have white ceilings but if you don’t, it’s not a problem. With all of the stuff that came off of the overhead, you should have a viable sample of the original paint to take down and get matched by Sherwin Williams, Home Depot, Lowes, or anywhere else that will match your paint for you.
No products found. is generally pretty affordable and whatever you purchase, it’s going to last a good long while since you will only need it for small surface areas. If you can, pick up a No products found.. You can always use a paint brush, but brushes tend to leave visible patterns.
Roll out your primer over your clean, dry putty area and allow it to dry for a few hours. Later, come back with a finish paint for drywall.
It should be the exact color of your primer, which is something that you can work out when you purchase or match your paint.
Once you’ve rolled on your finish paint, you’re all set and hopefully, you won’t have any nail pops to deal with down the road.

Extra Tools
If you are having a lot of problems with nail pops, you may want to find some things that will make your life easier. One of those things is a No products found..
With a setter bit, you don’t have to worry about not getting your drywall screw deep enough into the sheetrock or not deep enough.
The setter bit has a Phillips tip embedded in a larger circle that is concave. The stainless steel circle wraps around the Phillips Head, not quite flush with the tip. Once the screw head reaches the sheetrock, the setter bit will stop you from going too deeply into the sheetrock.
For popcorn ceilings, you go through all of the same, above-listed instructions, however, a little add-on will benefit the overall aesthetic when you are done priming and painting. Place a little bit of the putty into a Ziploc bag or something similar.
Cut a hole in the corner of the Ziploc so that you can use it as a piping instrument like you would for putting icing on a cake. You can use the piping you created to create new popcorn patterns on the smoothed-over section of the ceiling.
It won’t look perfect, but it will blend in much better than it would have.
If you want something more finished looking, a can of No products found. should do the trick.
Final Thoughts
Repairing nail pops in the overhead is not the most difficult job in the world, but it needs to be done, especially if the problem is a little excessive. Besides, the nails that you are removing are going to be replaced with drywall screws, so you can be happy knowing that you are systematically strengthening your sheetrock overhead.
Resources
- https://www.washingtonpost.com/lifestyle/home/is-there-a-way-to-stop-nail-pops-in-the-ceiling-of-my-townhouse/2021/08/01/d82effe8-ea38-11eb-97a0-a09d10181e36_story.html
- https://www.yoursuperior.com/drywall-nail-pop.php
- https://www.jeswork.com/services/foundation-repair/problem-signs/drywall-nail-pops/